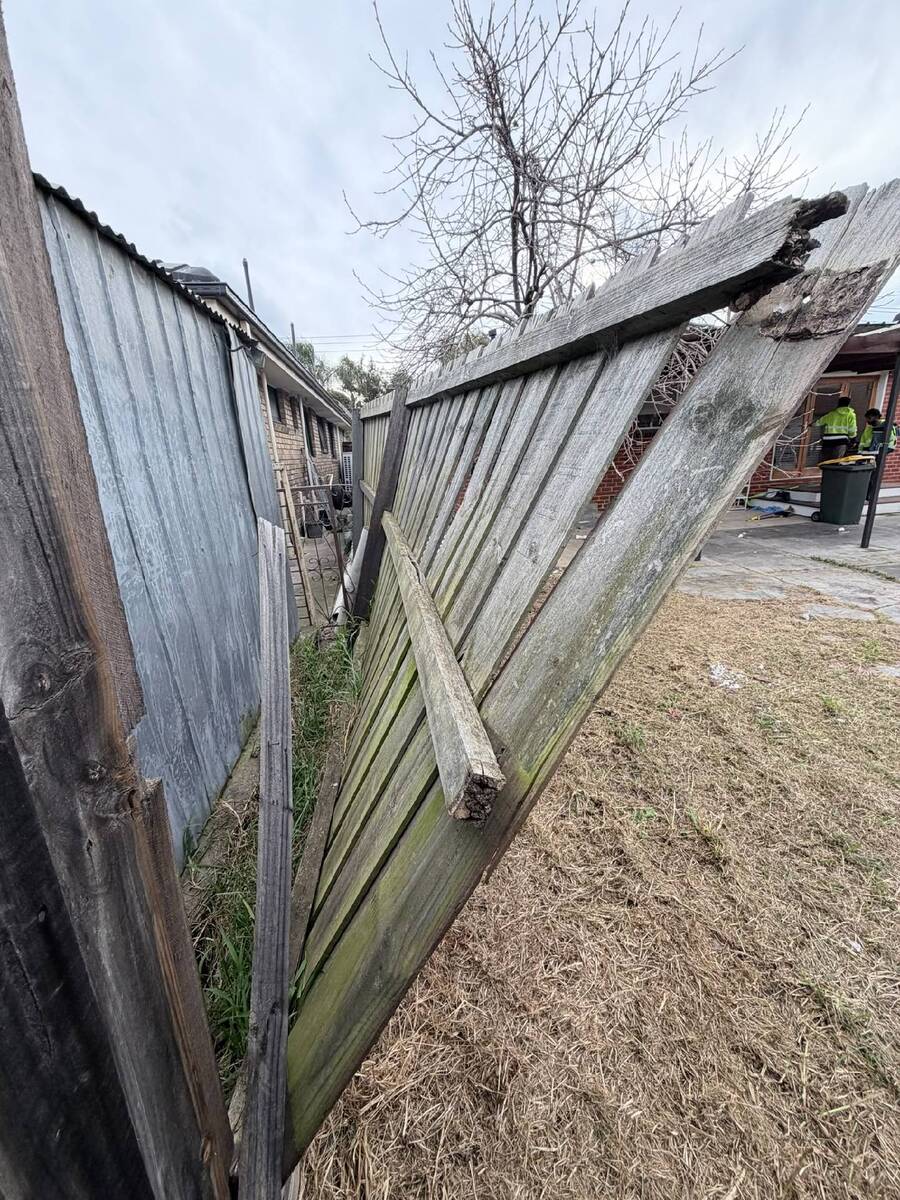
Why is my fence leaning?
Before you fix anything, understand what you're fixing. Fence posts fail in a handful of predictable ways:
- Rot at ground level. The most common cause on wood fences. Moisture and soil contact rot the post exactly where it enters the ground — the point of maximum stress. The post snaps or turns soft and spongy, and the fence tips.
- A loose or undersized footing. Posts set in plain soil, or in too little concrete, gradually work loose — especially in soft or sandy ground.
- Frost heave. In cold climates, freeze–thaw cycles slowly jack shallow posts upward and sideways over several winters.
- Soil movement and water. Erosion, a downspout dumping at the fence line, or heavy saturated soil after storms can push a fence over time.
- Wind load. Solid privacy panels act like sails. One big storm can start a lean that gravity then finishes.
Step 1: Diagnose which post (or posts) failed
Walk the leaning run and push each post firmly at the top. A healthy post feels planted; a failed one rocks, creaks, or moves at the base. Then get down and inspect the base of each suspect post:
- The screwdriver test: push a flathead screwdriver into the post at ground level. Sound wood resists. If the blade sinks in easily, the post is rotted through and must be replaced — bracing won't save it.
- Check the footing: dig a few inches down beside the post. Is there a concrete collar? Is it cracked or tilted? Is the hole mostly loose soil?
- Check how many posts are involved. One failed post is a classic DIY fence repair. Three or more in a row suggests the whole run was set shallow or the soil has shifted — that's a bigger conversation (see DIY or hire a pro?).
Tools and materials you'll need
For re-setting or replacing one post
- Post-hole digger or shovel, and a digging bar for breaking up old concrete
- Level (a 4-foot level, or a post level that straps on)
- Two lengths of scrap 2×4 for temporary braces, plus stakes and screws
- Fast-setting concrete mix (typically one to two 50 lb bags per post) and gravel for the base
- A replacement 4×4 pressure-treated post, if the old one is rotted
- Drill/driver, exterior screws, hammer, pry bar, reciprocating saw (helpful for demo)
- String line to check the whole run is straight when you finish
Before you dig: call 811
In the US, call 811 (or use your state's online service) at least a few business days before digging so buried utilities get marked — it's free. Also confirm your property line before moving a boundary fence, and check whether your HOA or city has rules about fence repairs. Skipping this step is how a $50 fix turns into a cut cable line or a neighbor dispute.
Step 2: Brace the fence so it can't fall
Before disturbing the post, screw a diagonal 2×4 brace from the fence (high on a sound part of the panel or a neighboring healthy post) down to a stout stake driven into the ground on the side the fence is leaning away from. This keeps the run controlled while you work and stops a gust from taking the whole section down mid-job.
Step 3: Free the post from the panels
Remove the screws or nails fastening the rails/panels to the bad post on both sides. If the fence is a panel style, you may be able to lift the whole panel out and set it aside. Support anything you detach so it doesn't sag or twist while the post is out.
Step 4: Get the old post out
Dig around the post to expose the footing. Concrete footings come out with the post surprisingly often if you rock the post with a lever — a long 2×4 under a block works as a fulcrum — or you can break the concrete up in place with a digging bar or sledge and lift the pieces out. If the post snapped at ground level (very common with rot), dig down, expose the buried stub and its footing, and remove both. Clean the hole out to firm soil and widen it slightly: you want room for a proper new footing, typically a hole about 10–12 inches across and 24–36 inches deep — as a rule of thumb, bury about a third of the post, and go below the frost line in cold climates.
Step 5: Set the new post (or re-set the sound one)
-
Gravel first
Pour 4–6 inches of gravel into the bottom of the hole. This drains water away from the post end — the single best thing you can do to slow future rot.
-
Position and plumb
Stand the post in the hole, check it against your string line for the run, and level it on two adjacent faces. Brace it in both directions with your 2×4s screwed to stakes so it can't drift while you pour.
-
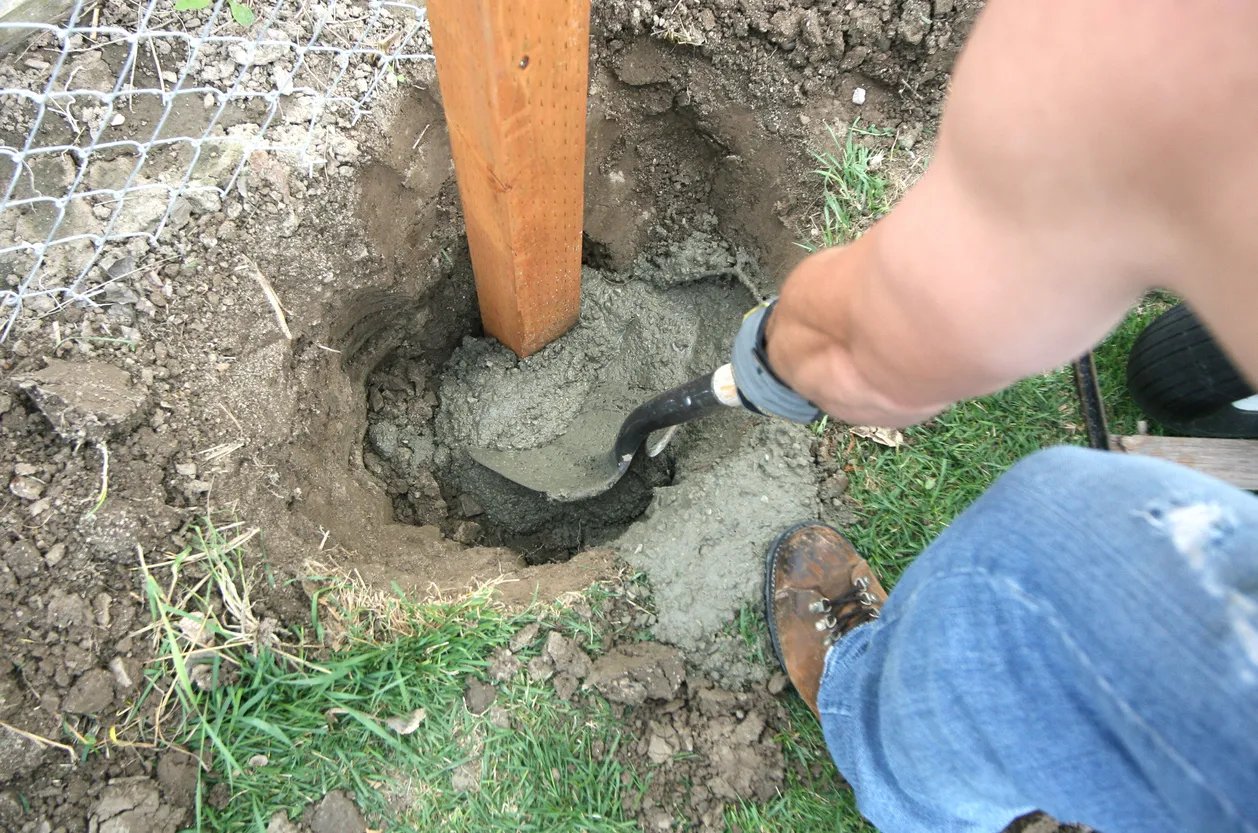
Pour the concrete
Add dry fast-setting mix (or pre-mixed concrete) in layers, following the bag's directions for water. Slope the top of the concrete slightly away from the post — a small "crown" sheds rain instead of pooling it against the wood. Re-check plumb before it sets; you have a few minutes to nudge.
-
Let it cure
Fast-setting concrete is firm in under an hour but shouldn't take the fence's full load right away. Leave the braces on and wait at least 24 hours before re-attaching panels and putting real stress on the post — longer in cold weather.
Re-setting a sound post instead? If the post passed the screwdriver test and only the footing failed, you can often skip the new post: dig out around it, push the fence upright, re-plumb, brace it, and pour a fresh, wider concrete collar around the existing post. It costs less and works well — as long as the wood itself is genuinely solid.
Doing the math on this repair?
See what a pro charges for post replacement and other common jobs in your area — before you commit a weekend.
Step 6: Re-attach, align, and finish
Once the concrete has cured, re-attach the rails or panels, checking the top line against your string as you go. Replace any fasteners that were rusty or stripped. If you replaced a post on a wood fence, treat the cut end and the ground-line zone with wood preservative, and plan to stain or seal the new wood once it has dried — new pressure-treated lumber should weather for a few weeks before staining.
When a leaning fence needs a pro instead
- Three or more posts have failed along one run — the run likely needs rebuilding, not spot fixes.
- The fence is on a shared property line and your neighbor disputes the boundary or cost-sharing.
- The lean is caused by a retaining wall failing, a slope slipping, or major drainage problems.
- The fence is vinyl or aluminum with proprietary parts that need exact matching.
- You need a permit or HOA approval you don't want to navigate alone.
For the full split of DIY-safe versus pro-only repairs, read Fence Repair: DIY or Hire a Pro? — and here's how to find a good fence repair company near you when it's time.
Leaning fence questions, answered
Can I fix a leaning fence without replacing the post?
Yes, if the post is sound. Options include re-setting it in a new concrete footing (described above) or, for a quick structural assist, installing a steel post mender/repair spike driven beside the post and bolted to it. Menders work best on posts that are loose or lightly rotted at the very base — they're not a rescue for a post that's soft all the way through.
How long does it take to fix a leaning fence?
For one post, plan on 2–4 hours of work spread across two days: an afternoon to dig, set and brace, then a short session the next day (after the concrete cures) to re-attach panels and remove braces.
How deep should a fence post be?
A common rule is to bury one-third of the post: about 2 feet for a 6-foot fence, in a hole roughly three times the post's width. In frost-prone areas the bottom of the hole should sit below the local frost line so heave can't lift it.
Why did my fence start leaning after a storm?
Wet soil plus wind load is the classic combination: saturated ground loses its grip on footings just as gusts push hardest on solid panels. The storm usually reveals posts that were already weakened by rot — which is why it's worth screwdriver-testing the neighboring posts while you repair the fallen one.